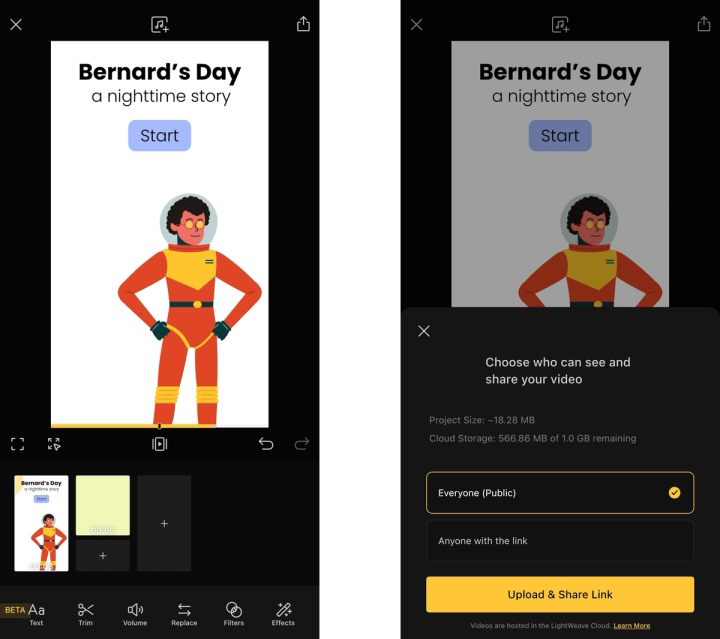
LightWeave Ravel is an interactive video maker available on the App Store and Google Play (coming soon!). You can use it to make branching stories, quizzes, product explainers, and a lot more. In this article, we’ll go through everything you need to know to make your first Ravel project by remaking Bernard’s Day, a short storybook available on the Ravel web player. We also have a video version of this tutorial on YouTube.
The Project List
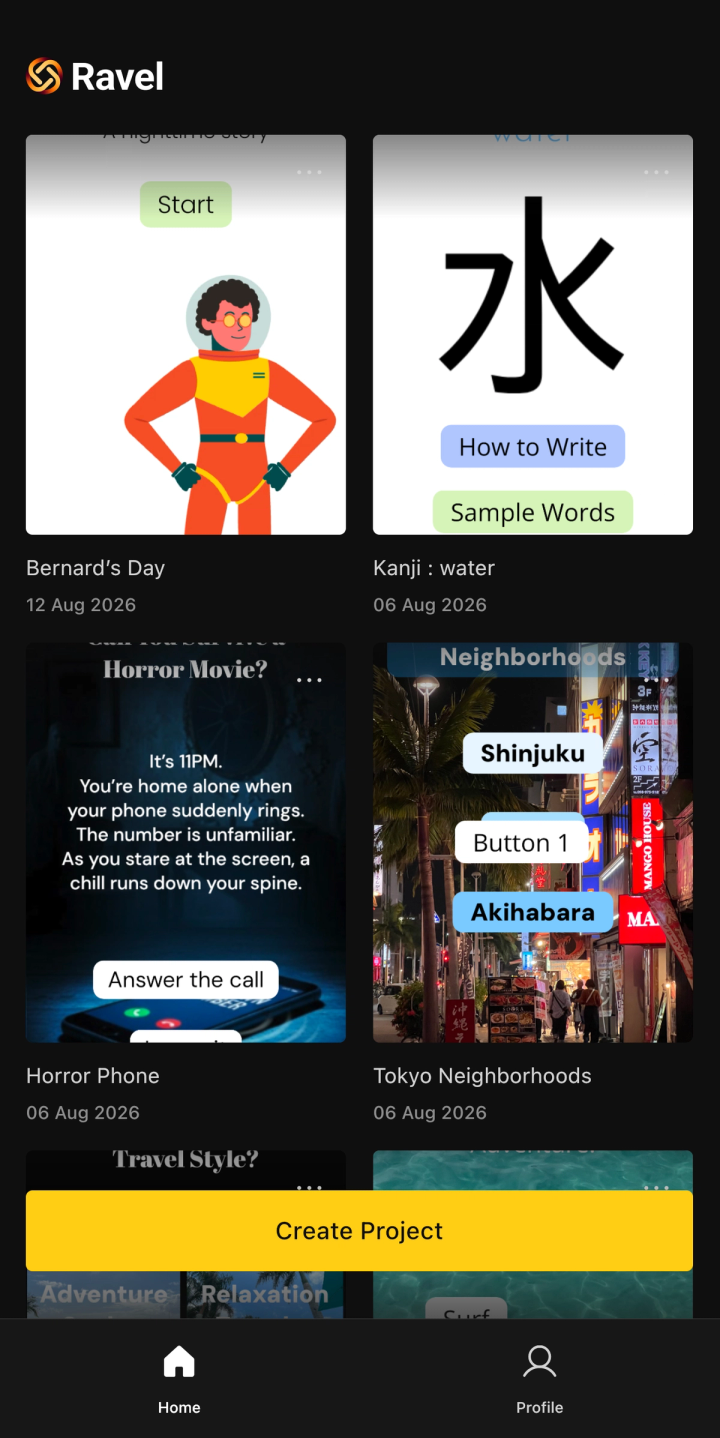
Opening Ravel takes you to the project list, where you can see all of the projects you’ve been working on, with the ones most recently edited appearing on top. You can rename, duplicate, or delete your projects by tapping the three dots at the top right at each thumbnail. If this is the first time you’ve opened Ravel, you may see some helpful coachmarks as well. Feel free to follow them and then come back to this article. Tapping the Create Project button will take you to the editing screen, where you can create your first project. The project list with the Create Project button at the bottom
The Editing Screen
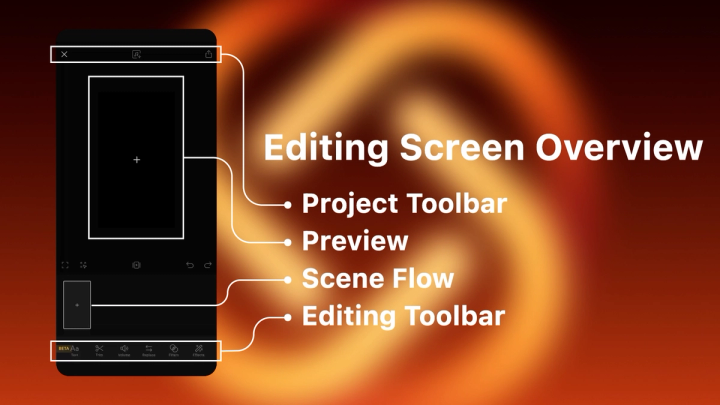
Projects in Ravel are a collection of scenes and the interactions that bind them together. The editing screen is where you’ll spend most of your time creating and editing your project. From top to bottom, you can find the project toolbar, the preview, the scene flow, and the editing toolbar. The editing screen consists of the project toolbar, the preview, the scene flow, and the editing toolbar.
Adding Your First Scene
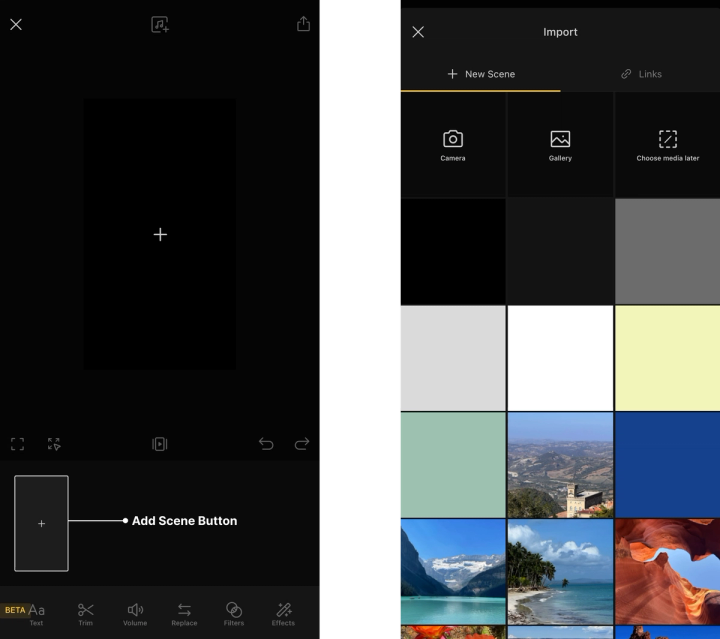
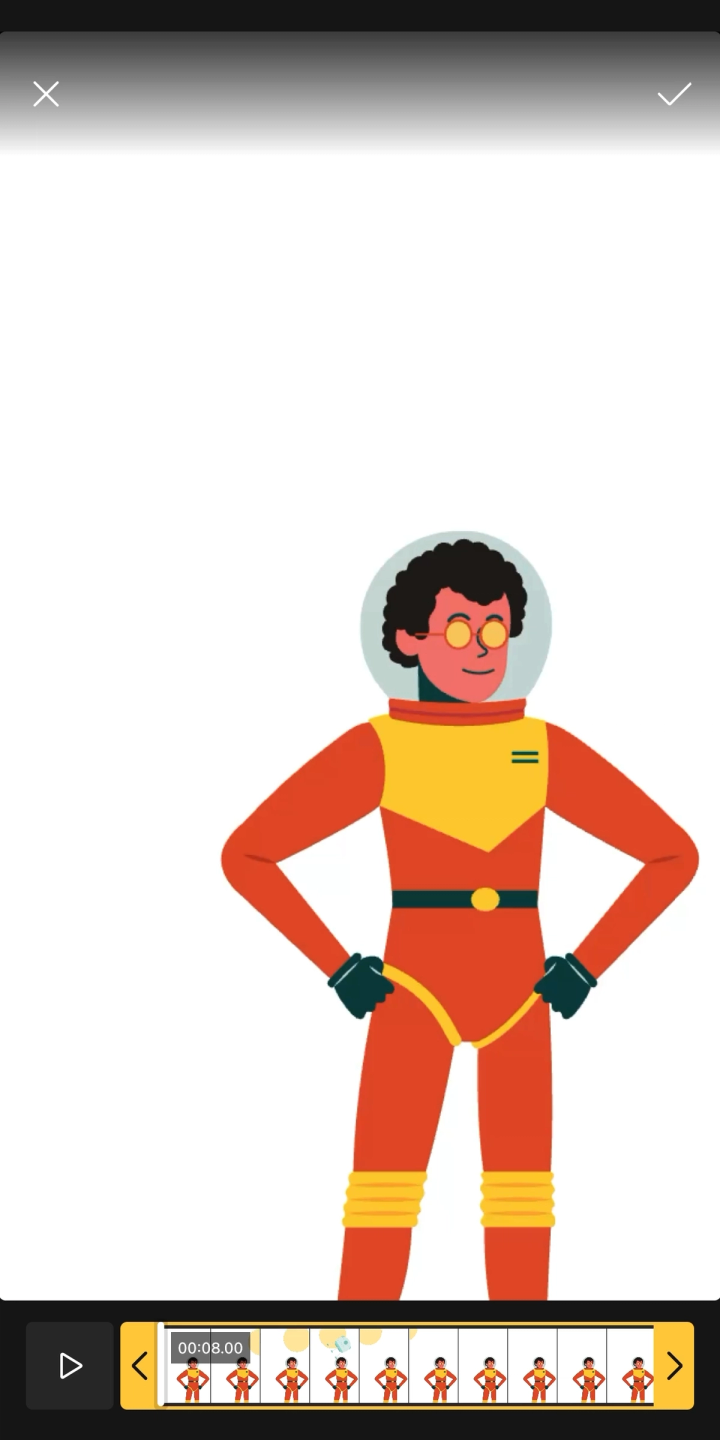
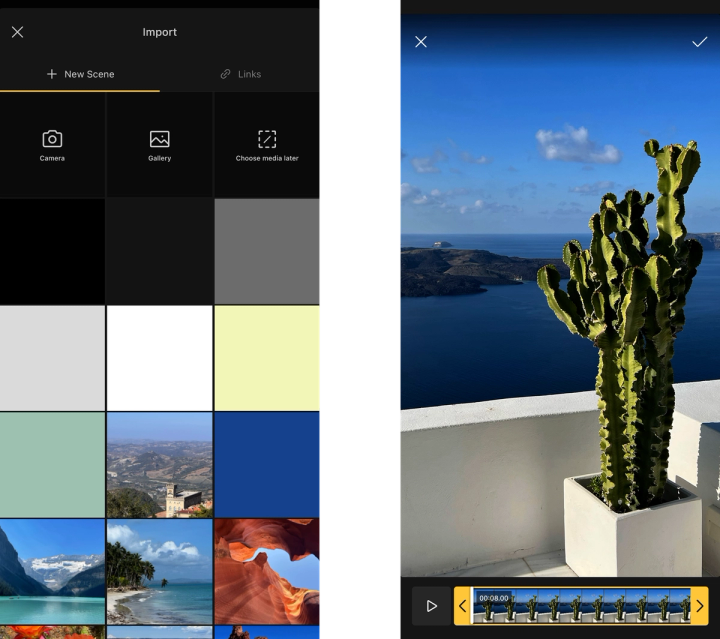
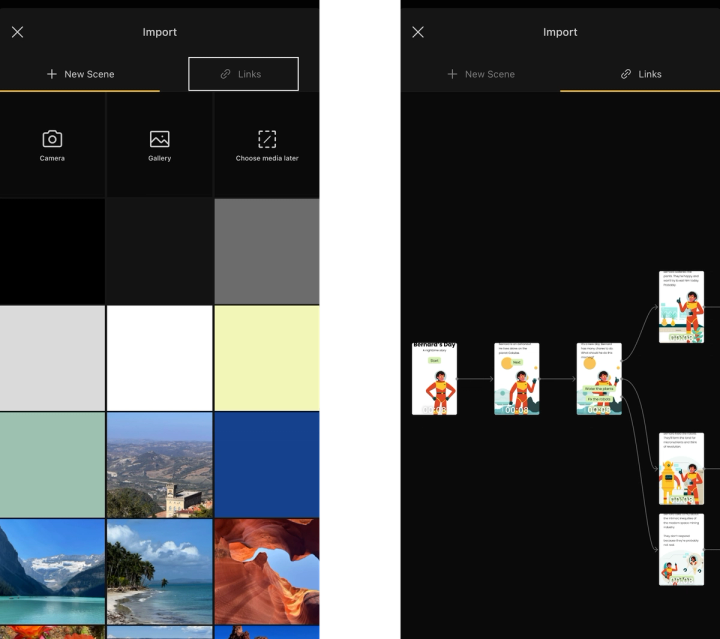
Add your first scene by tapping on the Add Scene (+) button in the scene flow. This creates a new scene and brings up the media picker. Here, you can choose to use sample media, an image or video from your gallery, or you can also tap Choose media later if you don’t quite know what you’d like in the scene yet. You can also take a photo or video as well. Tap the add scene button and then choose media. You may notice that the Links button is greyed out. This button allows you to link to an existing scene instead of creating a new one. We’ll come back to this option when we have scenes to link to. In the video, we chose the intro video we prepared for the Bernard’s Day storybook project by tapping on its thumbnail in the gallery, but you can choose anything you’d like. When you select the image or video you’d like to use in your scene, you’ll be taken to the trimming screen. Drag the yellow handles at the bottom to adjust the duration of your scene. Tap on the checkmark when you’re done, and the media will be added to the scene. Drag the yellow handles to adjust the duration of the scene.
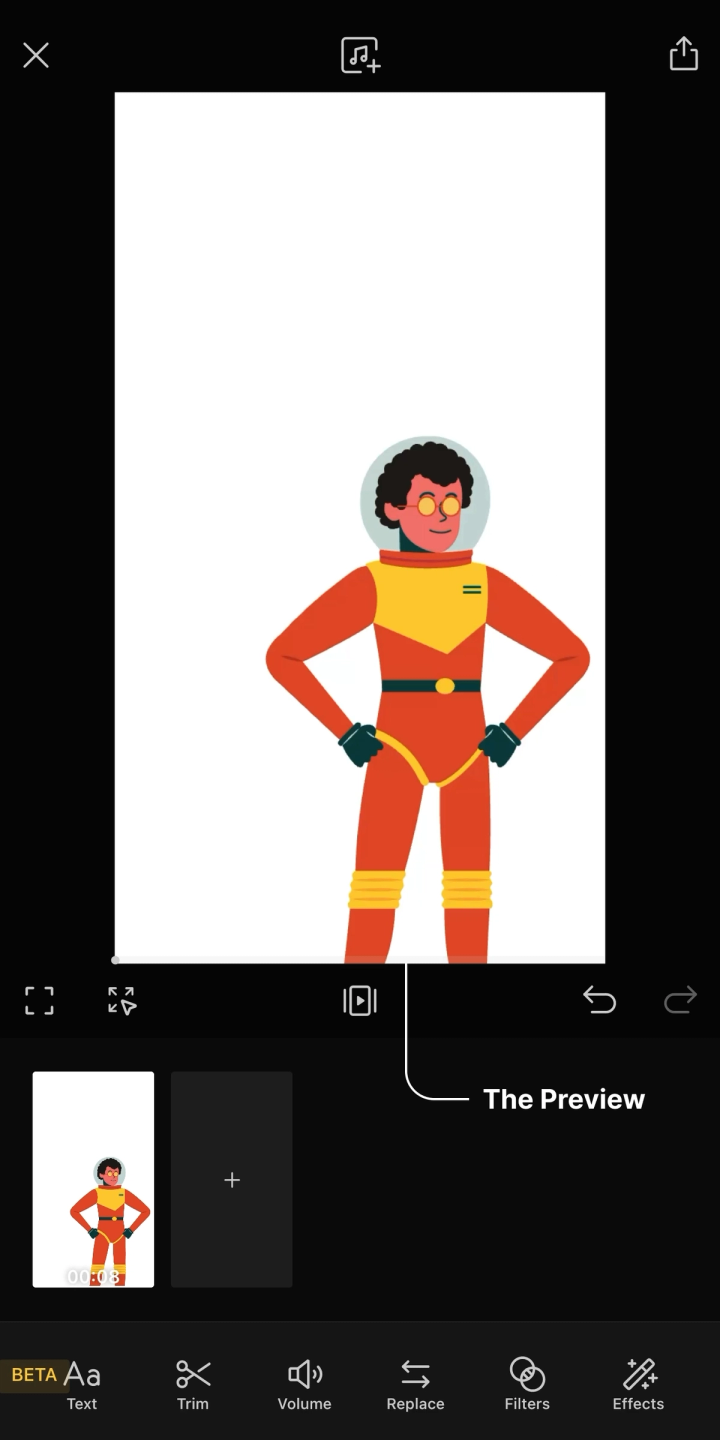
The Preview
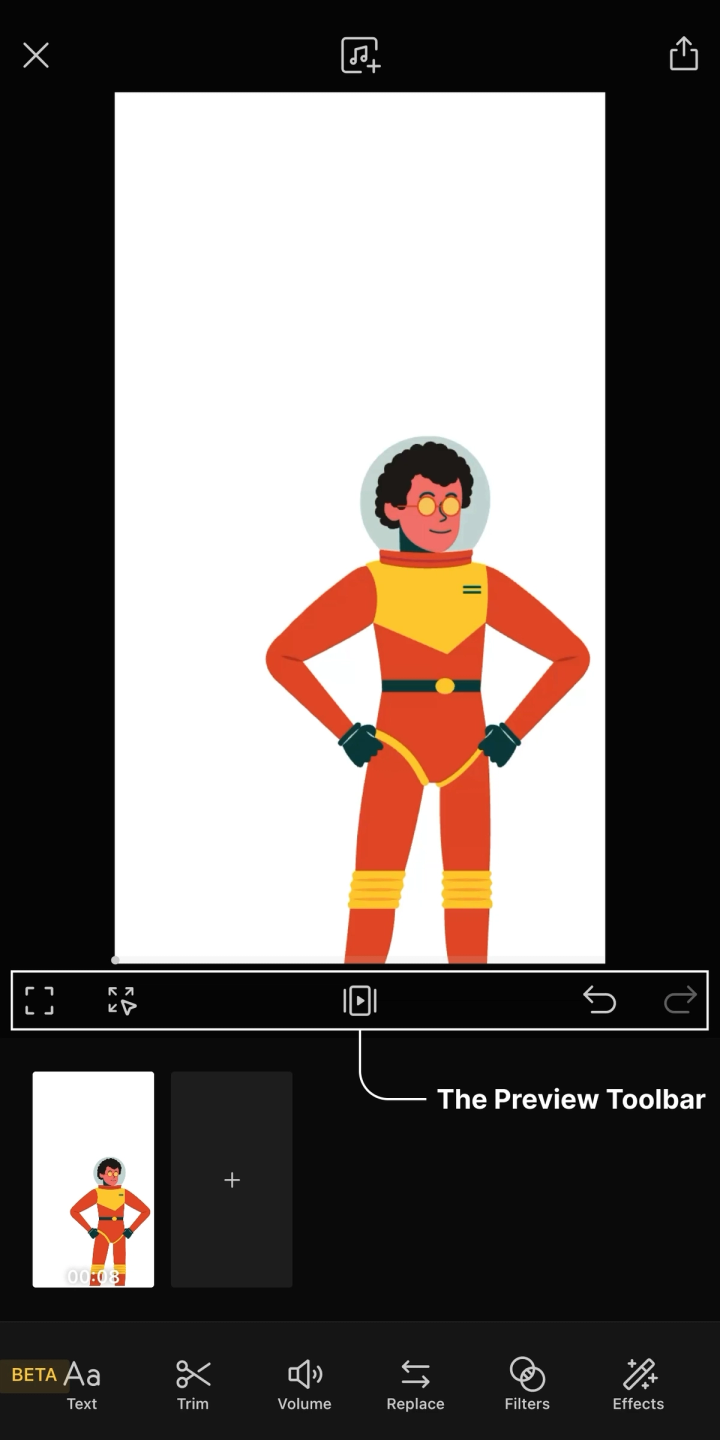
Now that there is a scene, we can see the editing screen in more detail. The preview displays your scene. You can scrub along the bottom of the preview to move the playhead to see a specific frame in your scene. See your project before you publish it. Just below the preview, you can find the preview toolbar. This contains a number of tools to help you navigate and test your project. From left to right, these are:
Full Screen Preview: View your scenes in full screen and test out the interaction buttons and overall flow of your interactive video.
Scene Overview: See your entire project structure in detail and navigate to any scene in your project easily.
Scene Play: Preview your scene from any point in the scene, without interactions. Play your project in full screen to test out your interaction buttons.
Undo & Redo: Undoes/redoes any actions performed in the current project session. Leaving the project or the app removes the undo history.
The preview toolbar contains the full screen preview, scene overview, scene play, undo and redo buttons.
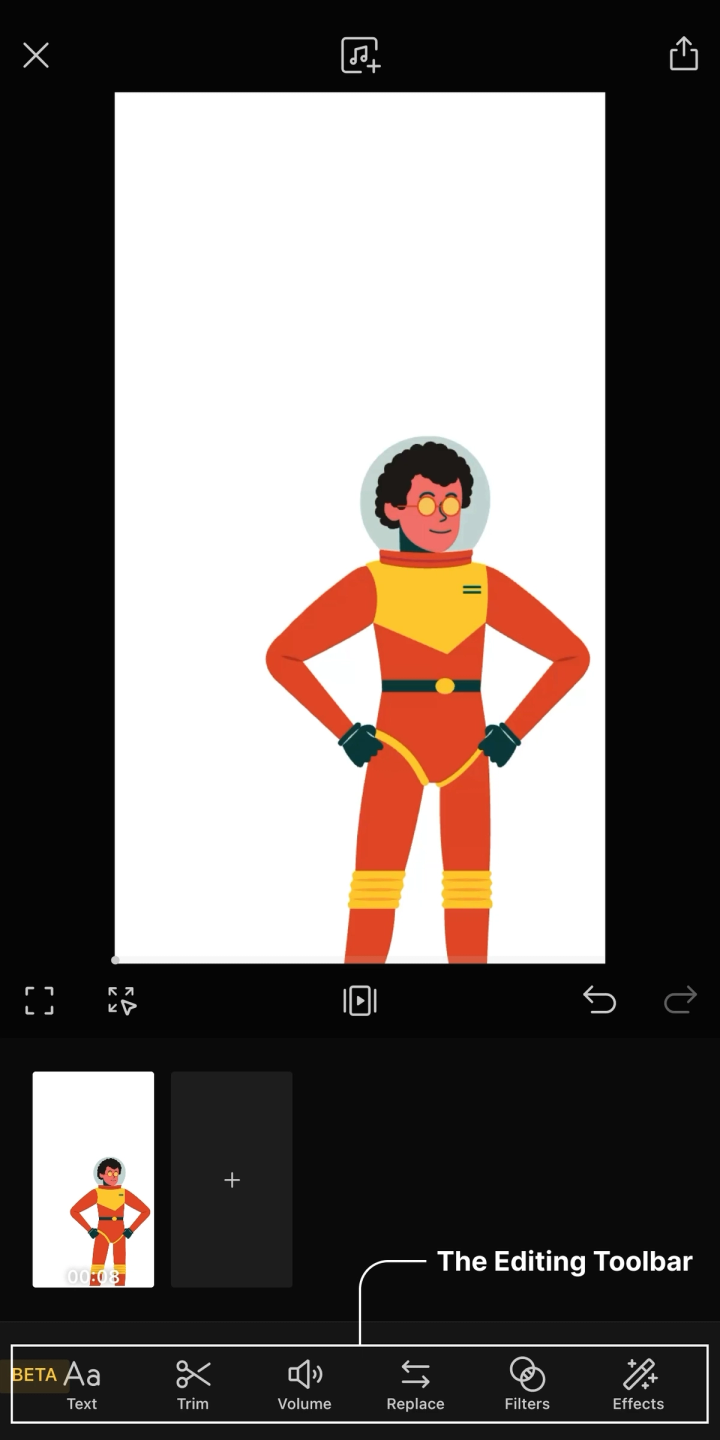
The Editing Toolbar
The editing toolbar lets you customize your scenes by adding text, filters, and effects, trimming the length of the layer, adjusting the volume, and replacing the current scene media. The editing toolbar contains text, trim, volume, replace, filters, and effects tools
Text
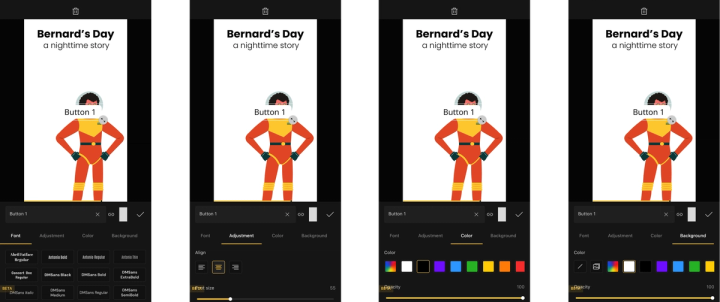
Tapping this button will add a text box to your scene. Drag on the preview to adjust the text layer’s position. Tap in the text field to edit the text in the text box. You also have the following options:
Font: Change the font.
Adjustment: Adjust the text alignment, the font size, horizontal and vertical padding for the text box, and the scale of the text.
Color: Change the color and opacity of the text.
Background: Change the color and opacity of the background of the text box.
Adjust the text font, alignment, size, and color, and the color of the background. You may want to use the same font style, color, and size for use across different scenes. You can save a text style by following these simple steps:
Adjust the style of your text,
Long-press the checkmark
Tap Save current style
To reuse a text style, add a textbox or an interaction button, and then long-press the same checkmark. You will then see a list of all the styles you’ve previously saved here. Tap one of them to apply a style.
Trim
You can drag on the yellow handles to trim the image or video and adjust the length of the scene. Tap on the X to cancel trimming or the checkmark to save the trim and return to the editing screen. Drag the yellow handles to trim.
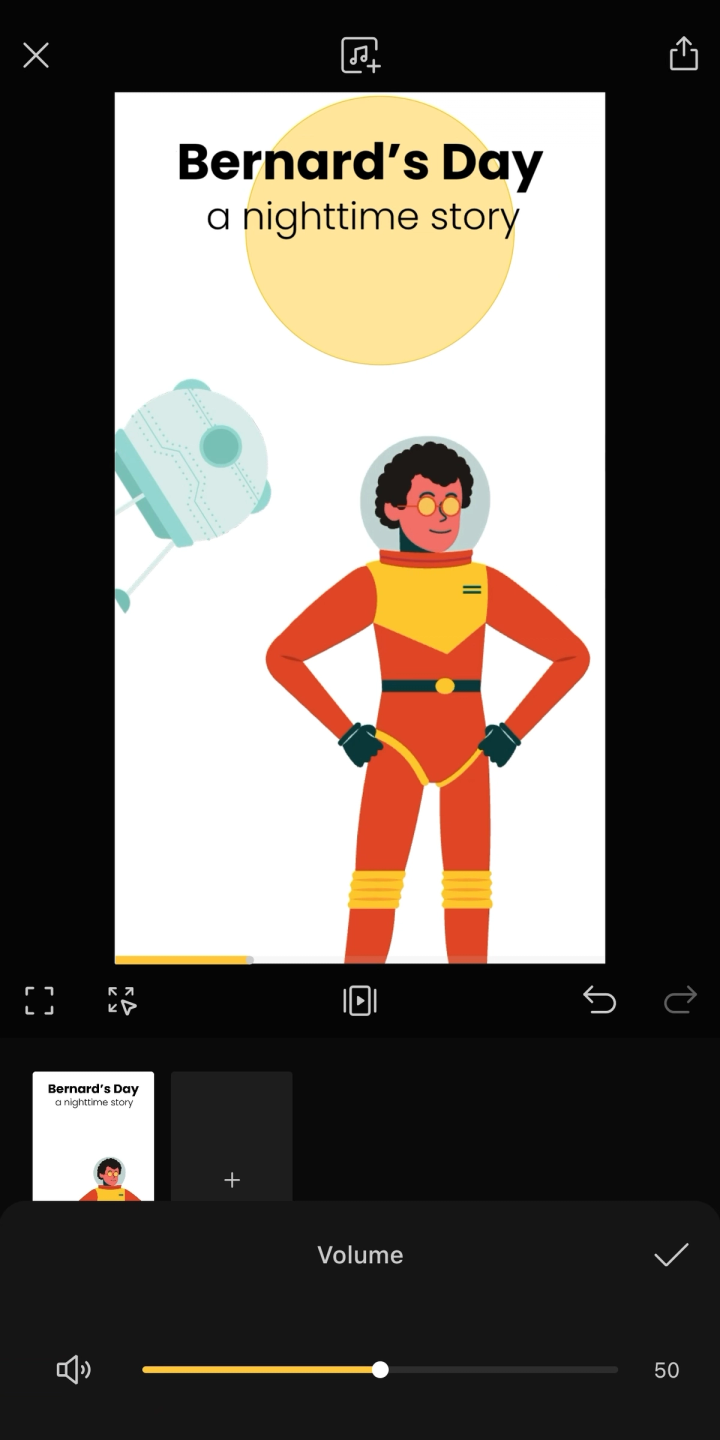
Volume
Drag on the slider to adjust the volume of a scene. This only affects the volume of any video in the scene, and not the volume of any music added to the project. The volume button will be greyed out if the media in the scene doesn’t contain any audio. Drag on the slider to adjust the volume of media in the scene.
Replace
Tap this button to replace the media of a scene with another image or video. This brings up the same media picker that appears when creating a new scene. (There’s that Links button again! I promise we’ll get to it!) The media picker lets you choose new media for your scene.
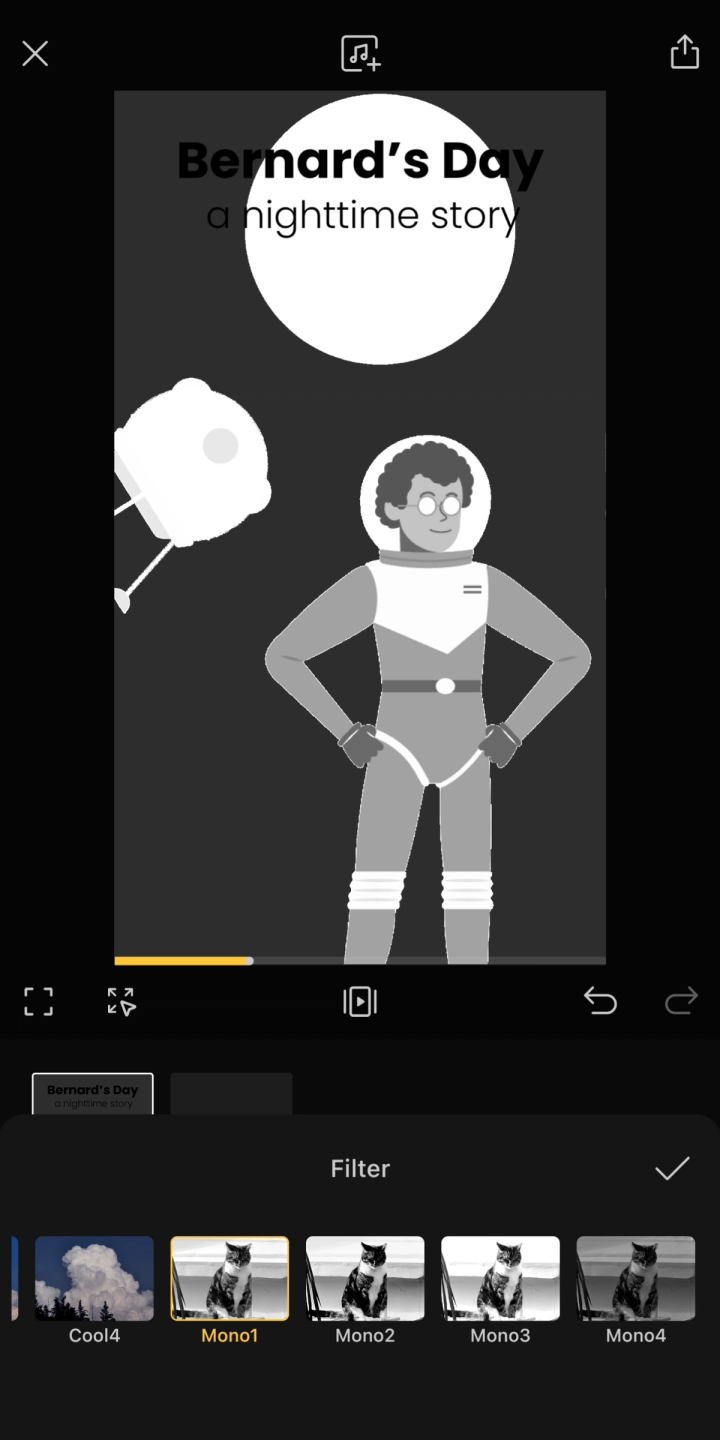
Filters
Apply various filters to your scene, to warm up or cool down the scene or turn everything greyscale. Choose a filter to change the look and feel of your scene.
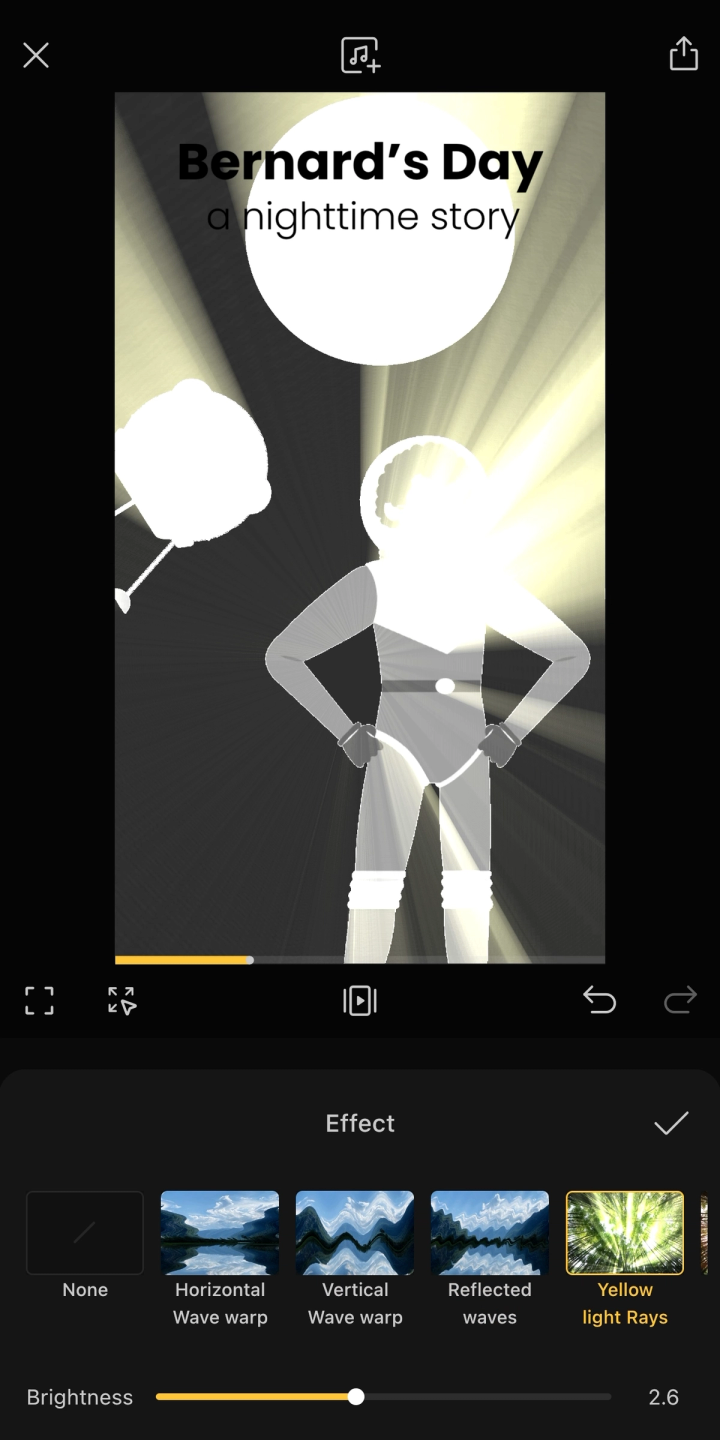
Effects
Apply various effects to your scene like gaussian blur or wave warp. Choose an effect to change the behavior of your scene.
Scene Flow
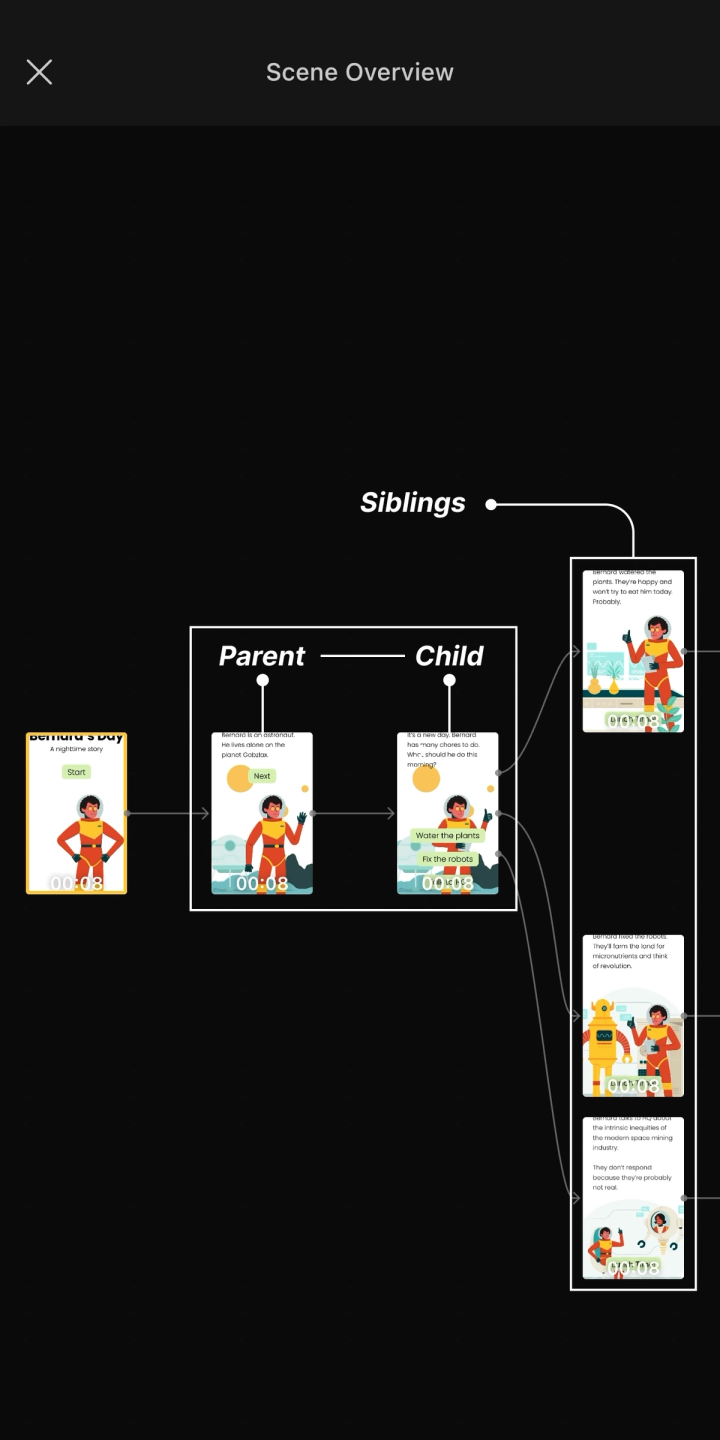
The scene flow is the primary way to navigate through the project. It lets you focus on one branch of your project at a time. Relationships between scenes are described in a similar way to how you would describe a family. Scenes that come directly before the current scene are called parent scenes. Scenes that come directly after the current scene are called children scenes. Children together are called siblings scenes. Scenes are described using family relationships. Swipe left and right to navigate between parent and child scenes, or swipe up and down to navigate between siblings. We can add new scenes to our project by tapping any add scene (+) button. This does three things simultaneously:
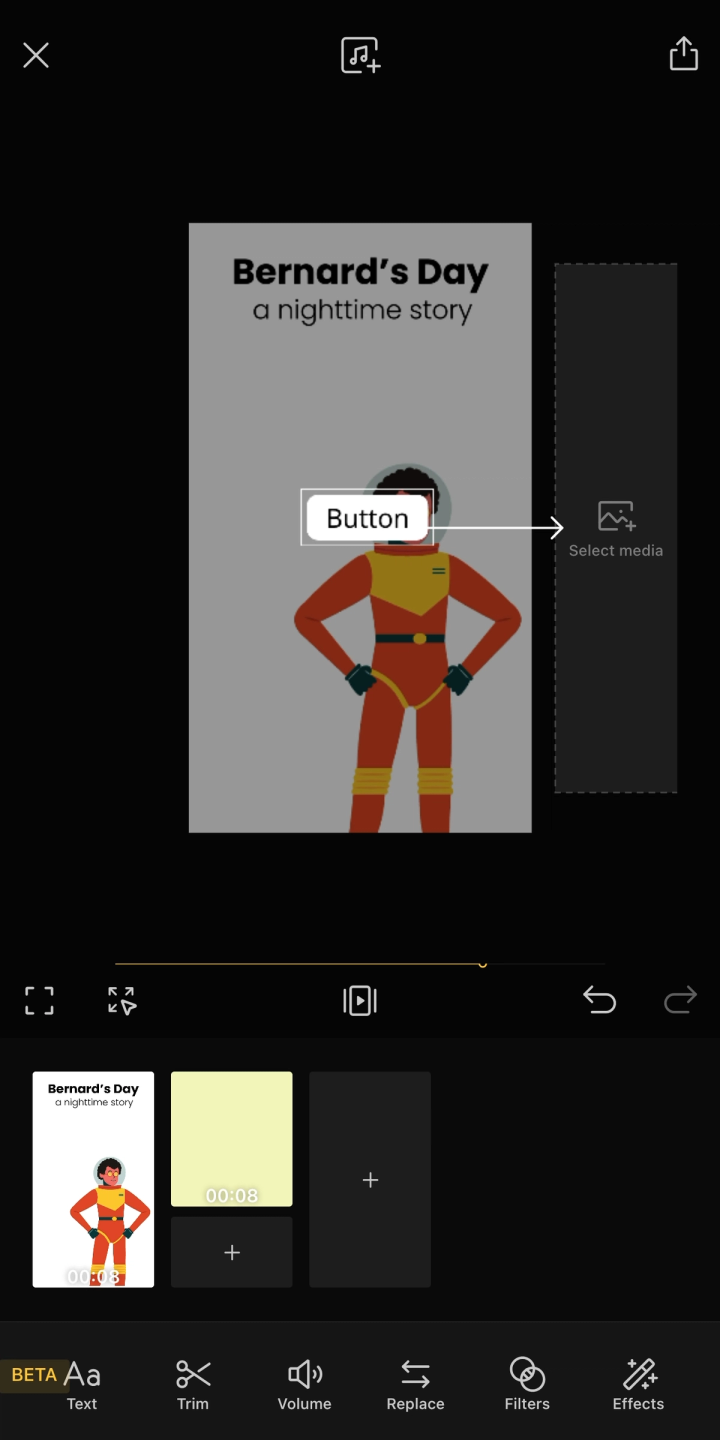
It adds an interaction to the scene, commonly known as a button. When your viewer taps this button, they’ll be taken to the connected scene. You can adjust the text, alignment, size, padding, text color and background color of the button just how you would for a text layer.
It also brings up the select media button, so you can pick the media you’d like to use for the next scene.
It also adds a new scene to the project, which you can view by tapping on the thumbnail in the scene flow.
You can choose which task you’d like to do first! After adding a button, you may notice a small black oval on the timeline. This is the interaction timing marker. By default, buttons do not appear on screen, but rather near the end of the scene. This marker shows the time when the buttons will appear in this scene. To adjust it, long-press and drag it along the timeline to the time when you want the buttons to appear.
Linking Scenes
In addition to adding new scenes, you can also link a button to existing scenes. Remember that Links button at the top right of the media picker? Tap this button to bring up the scene overview. From there, tap on the scene that you want to use to replace the current scene. Note that this will remove the scene that was originally in this place. If the scene was not linked anywhere else, it will delete the scene and any otherwise unlinked child scenes from the project. Tap the Link button to link an existing scene to this point.
Background Music
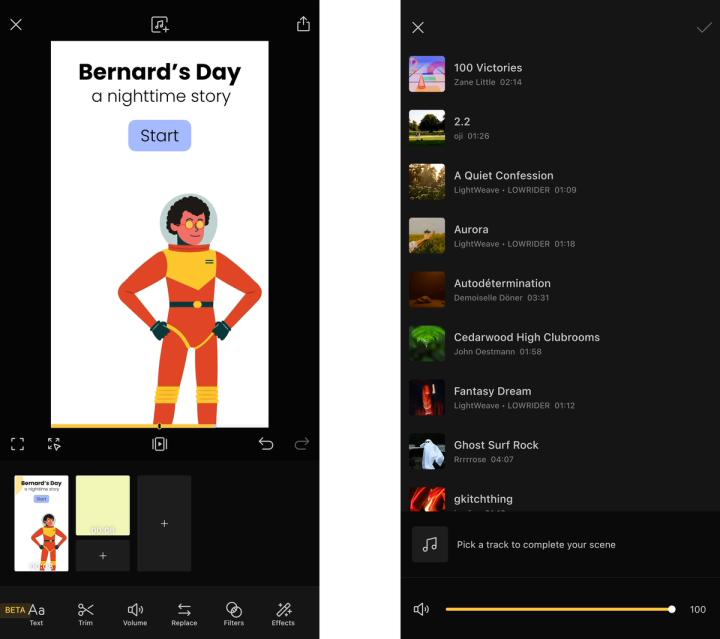
Select music for your project. You can select background music for your whole project by tapping on the Add Music button at the top of the screen in the project toolbar. We’ve provided a number of tracks to choose from, and you can change the volume at the bottom part of the screen.
Uploading and Sharing Your Project
Once you’ve reached a point where you’d like to share your project with the world, you can do so by tapping on the Upload button at the top right of the editing screen. Select how you’d like to share your project There are two sharing options in Ravel:
Everyone (Public): Selecting this option makes your video publicly available. This means your video can be seen and shared by anyone, and it may also appear in places like the front page and the Watch Next section of the Ravel web player.
Anyone with the link: Choosing this option will make it so that only people with the actual link to the project can view it. These projects will not appear anywhere else on the Ravel web player. Note that if you share the link publicly, we cannot be responsible for who sees your project.
After that, tap the Upload & Share Link button to upload your video to the Ravel web player. If you’re not signed in, you’ll be prompted to do so. Please stay on the upload screen as the upload may fail if you leave before it finishes. Once you’re done, you can share the link to your video with your friends or the world! Once the upload is complete, you’ll be presented with a few options to continue. You can choose to:
open the video in your web browser,
copy a link of your video on the Ravel web player to your clipboard,
export a preview of your video, or
bring up the system share menu so you can share the link with any other app directly.
Exporting a preview of your video takes the first scene of your project, including any interaction buttons, and exports them together into a video file, which will include a QR code at the end that will lead people to your original interactive video on the Ravel web player. You can then share this video on any platform you’d like, making it easier for people to find and enjoy your interactive video! As long as you don’t change anything in your project, tapping the Upload button will bring this menu up again. If you make any changes, tapping it will upload a new version of your interactive video to the Ravel web player and generate a new URL. If someone accesses the link to an old version of your video, they will be redirected to the newest version. You can use this feature to fix mistakes or make small updates to your project, and rest assured that people with links to an outdated version of your project will be able to see your updated work.
Next Steps
From here, you can start exploring everything that you can do with Ravel! Look at the Ravel web player for inspiration and join our Discord community or follow us on social media to keep up-to-date with new Ravel developments. You’re also welcome to check out our new LightWeave Ravel Docs page to learn more about Ravel. We want to make tools that people want to use, so feel free to send us feedback or ask questions at any time. We’ll do our best to help in any way we can. Looking forward to seeing your creations!